家用AIO考虑24*7运行的电费成本需要低功耗cpu,找了半天选择amd4700ge,这u没有零售只有OEM直接淘宝。
配置清单:
CPU:AMD 4700ge 8核16线程 TDP 35瓦
风扇:玄冰风6铜管
主板: 微星MAG B550M MORTAR WIFI
内存:2 * 16G
固态:英睿达P5 1T
供电:850瓦全模组
UPS:SVC BX1450L
硬盘:4 * 西数紫盘8T(WD80PURX)
硬盘裸装win10,8核16线程适合多任务:

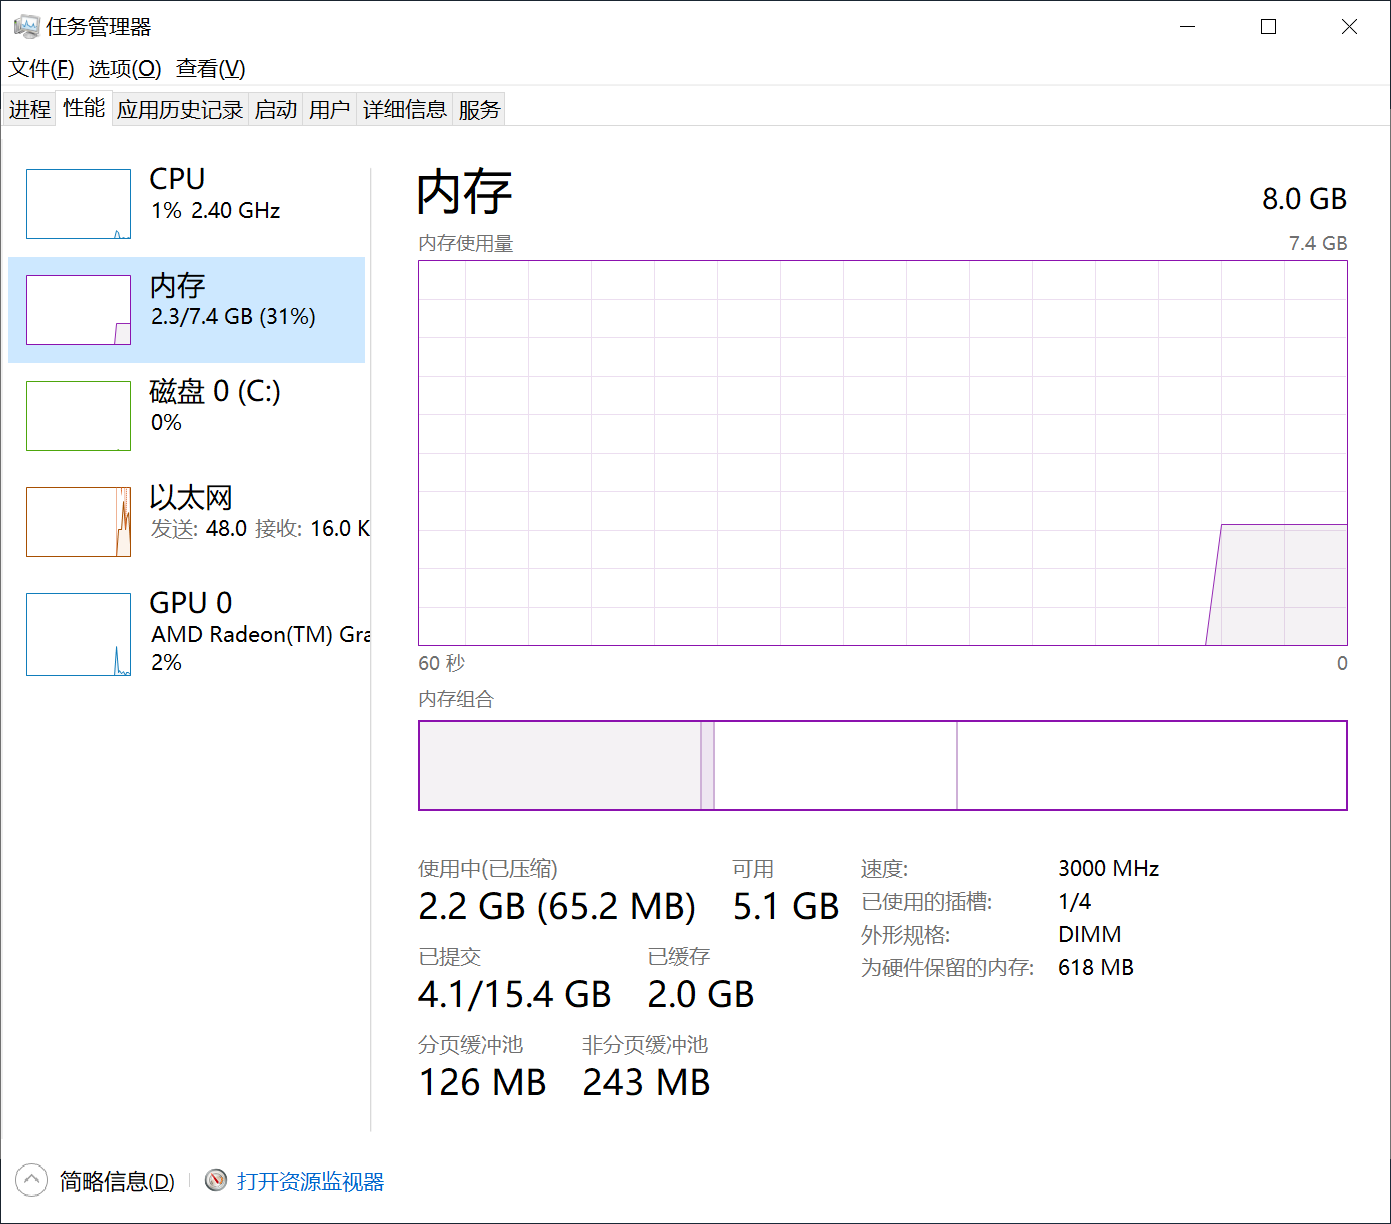
内存:
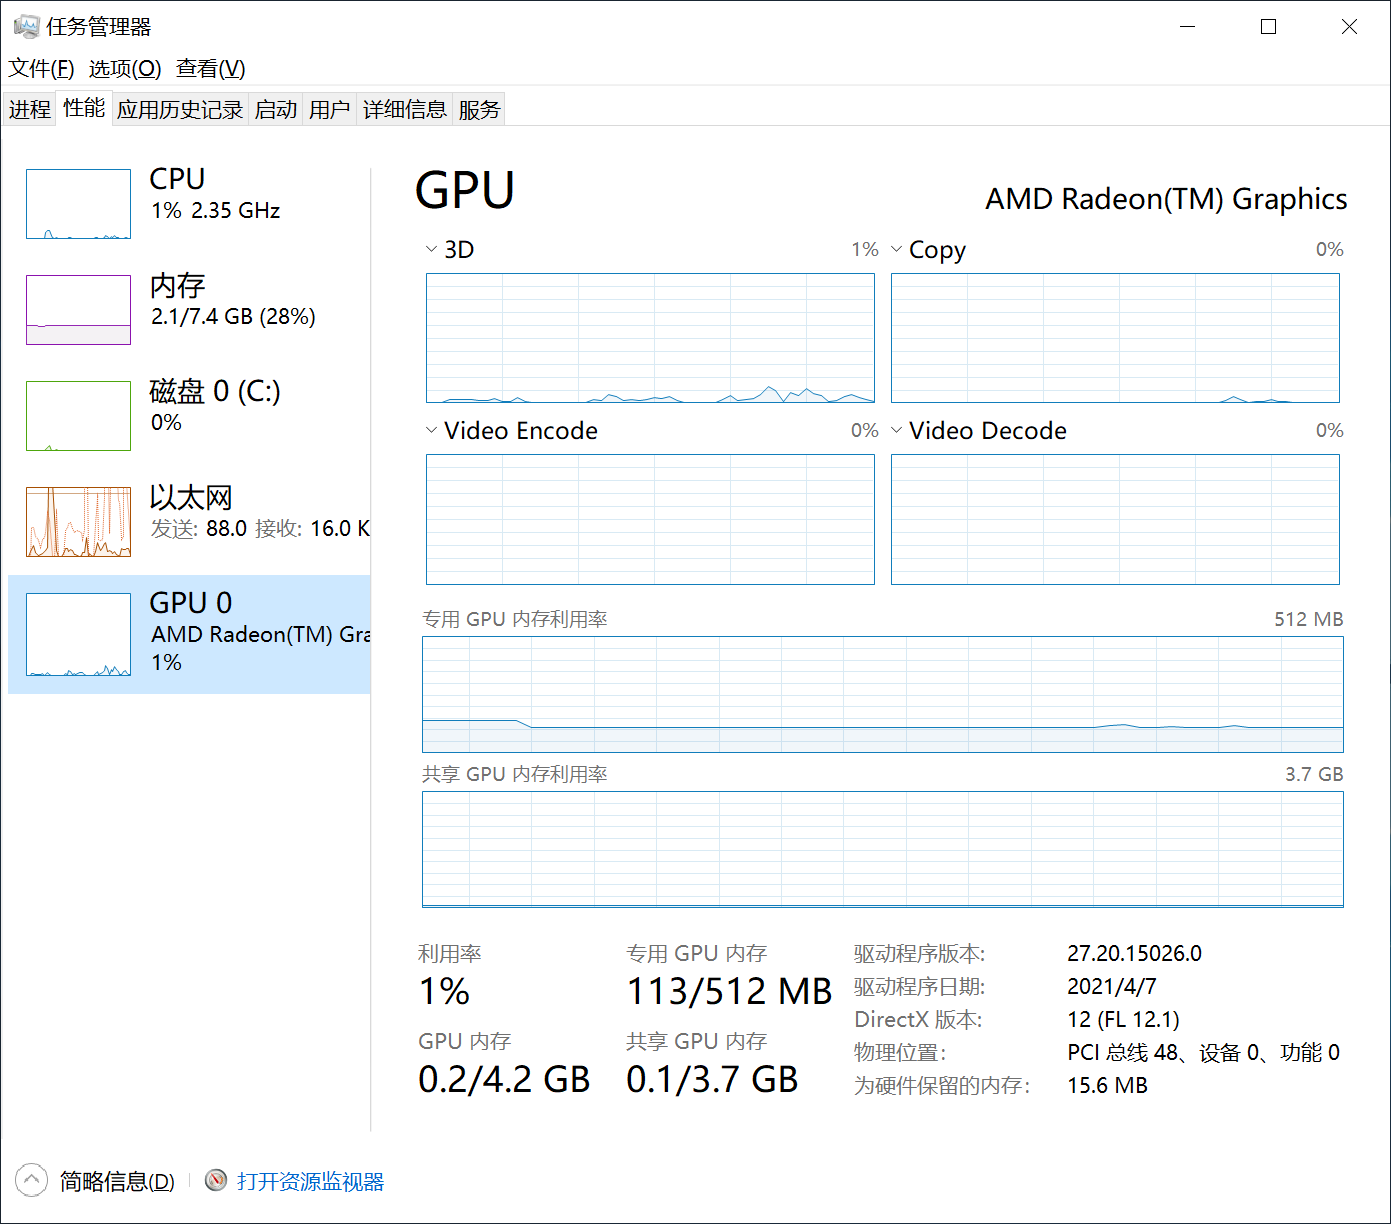
amd vega radeon集成显卡:
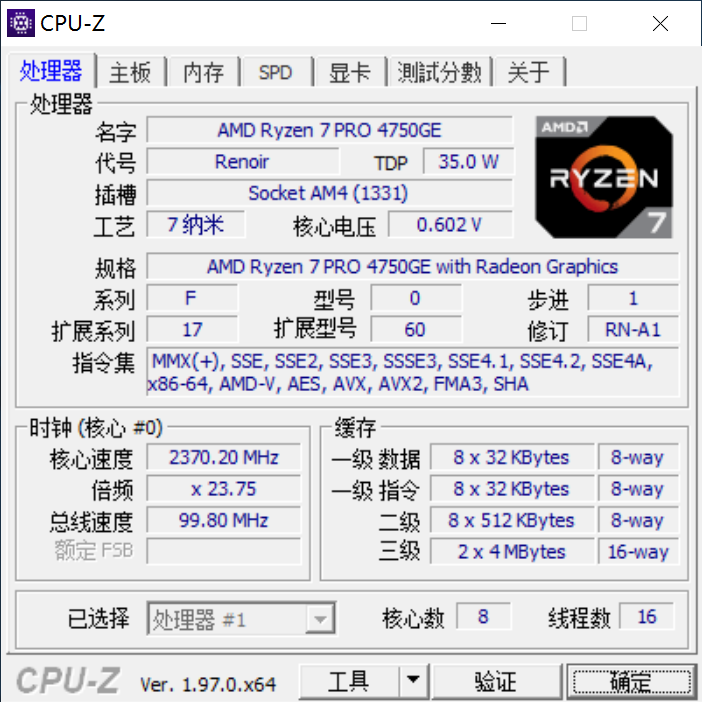
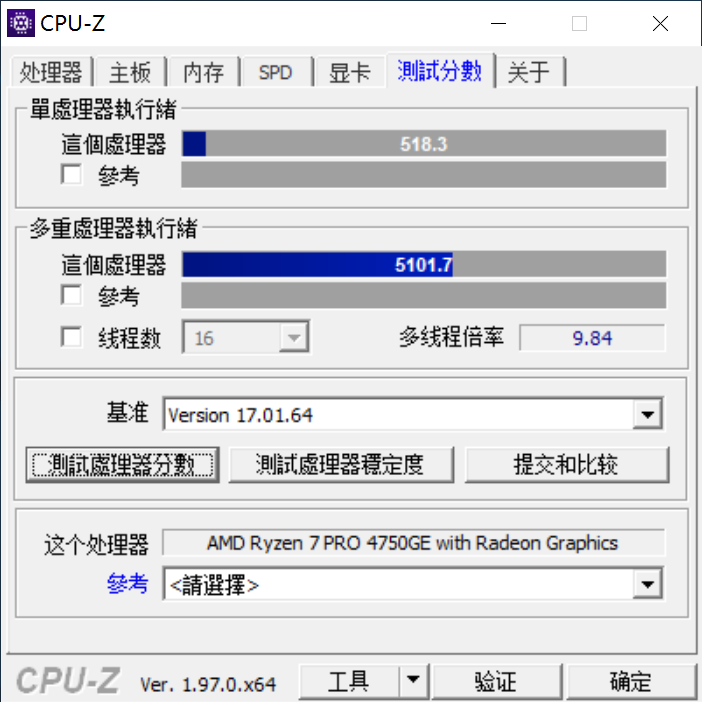
cpuz:
cpuz集成显卡:

cpu跑分:单线程533,多线程5300

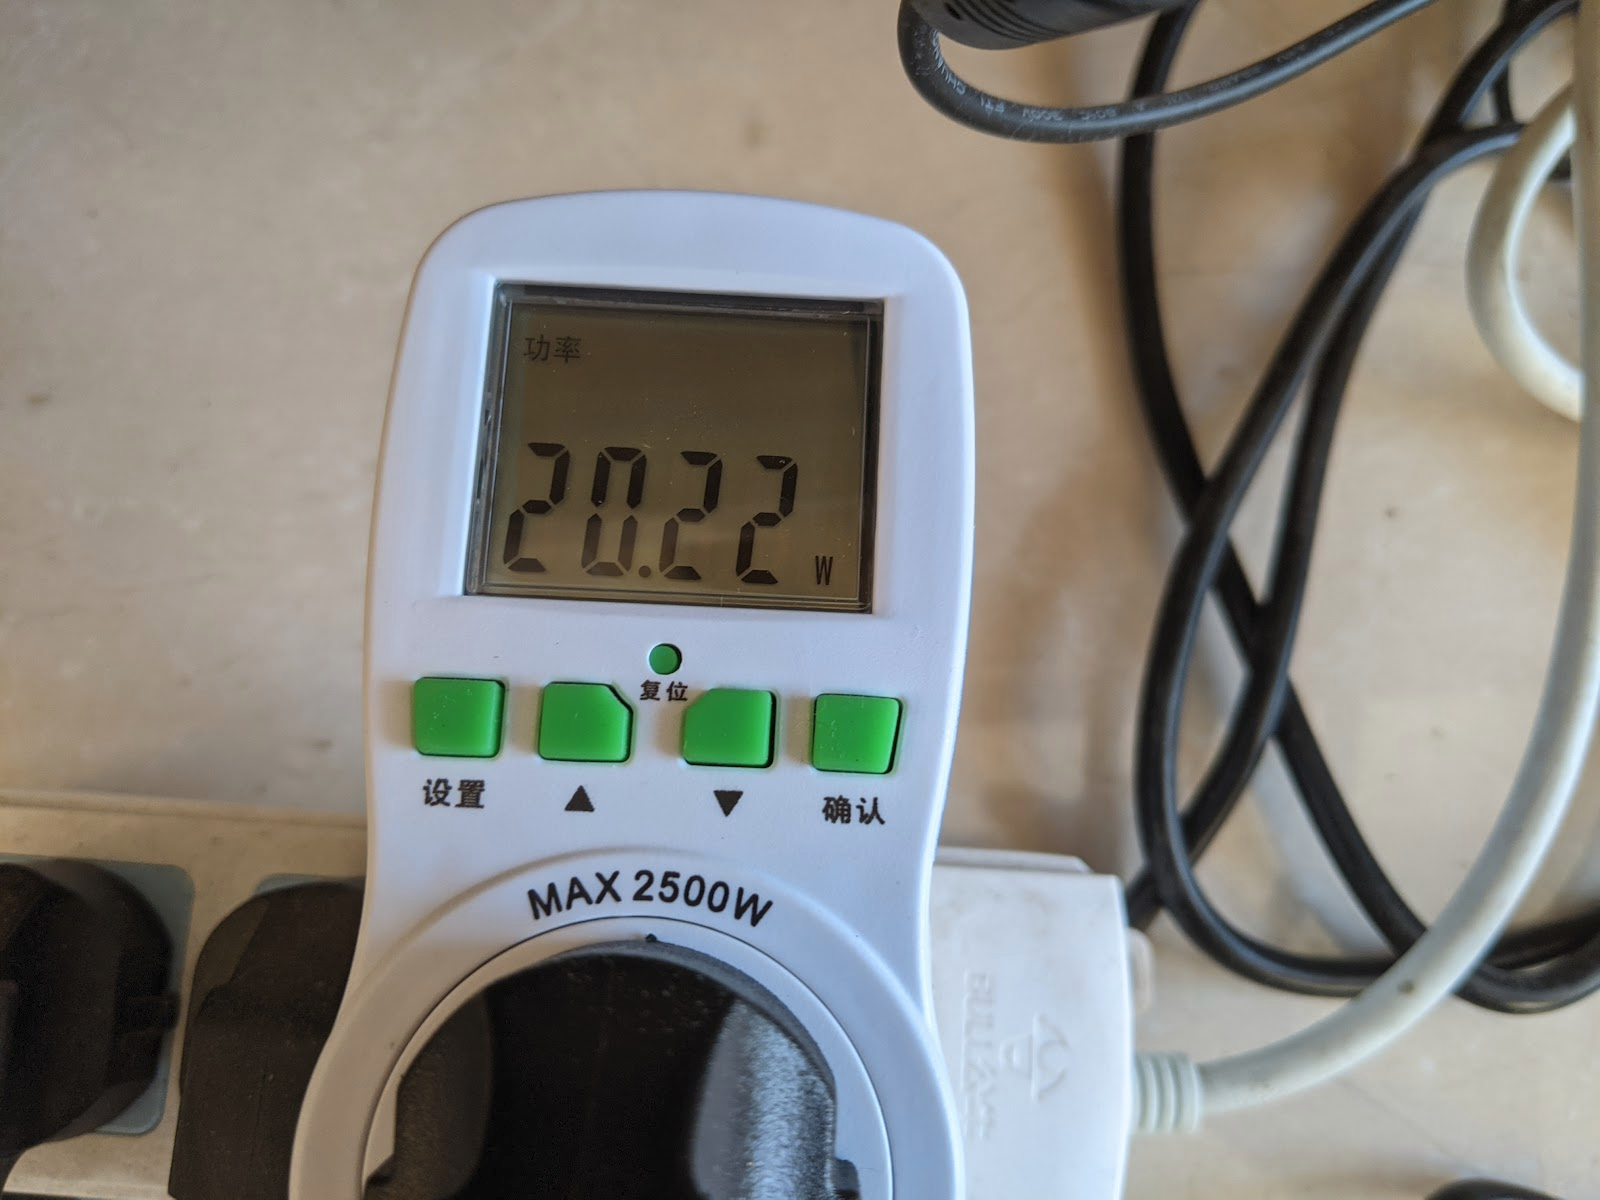
待机功耗:
英睿达P5健康度:
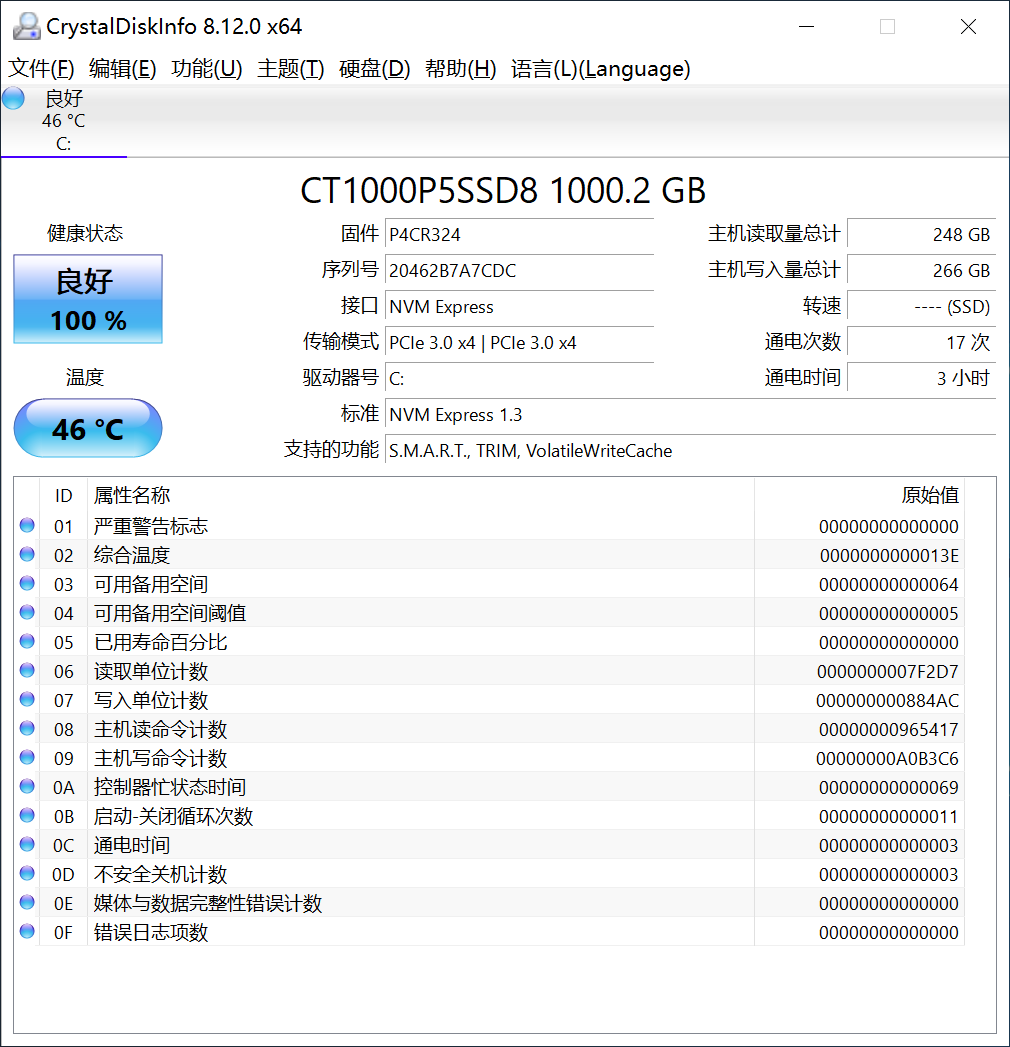
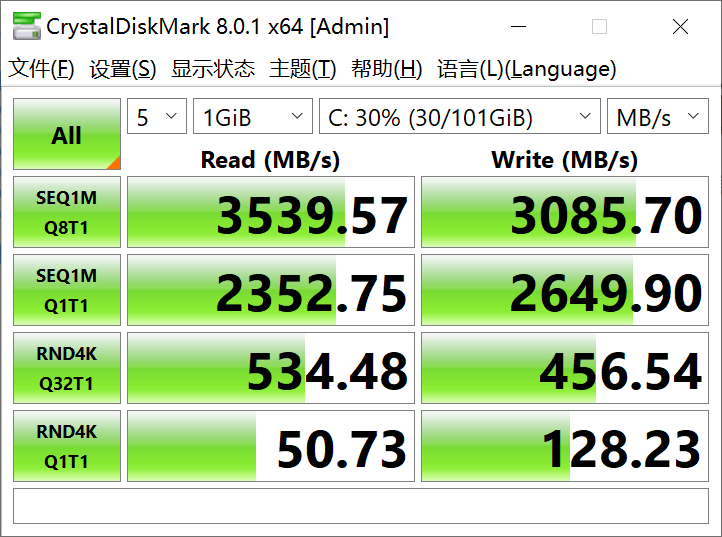
英睿达P5读写测速:
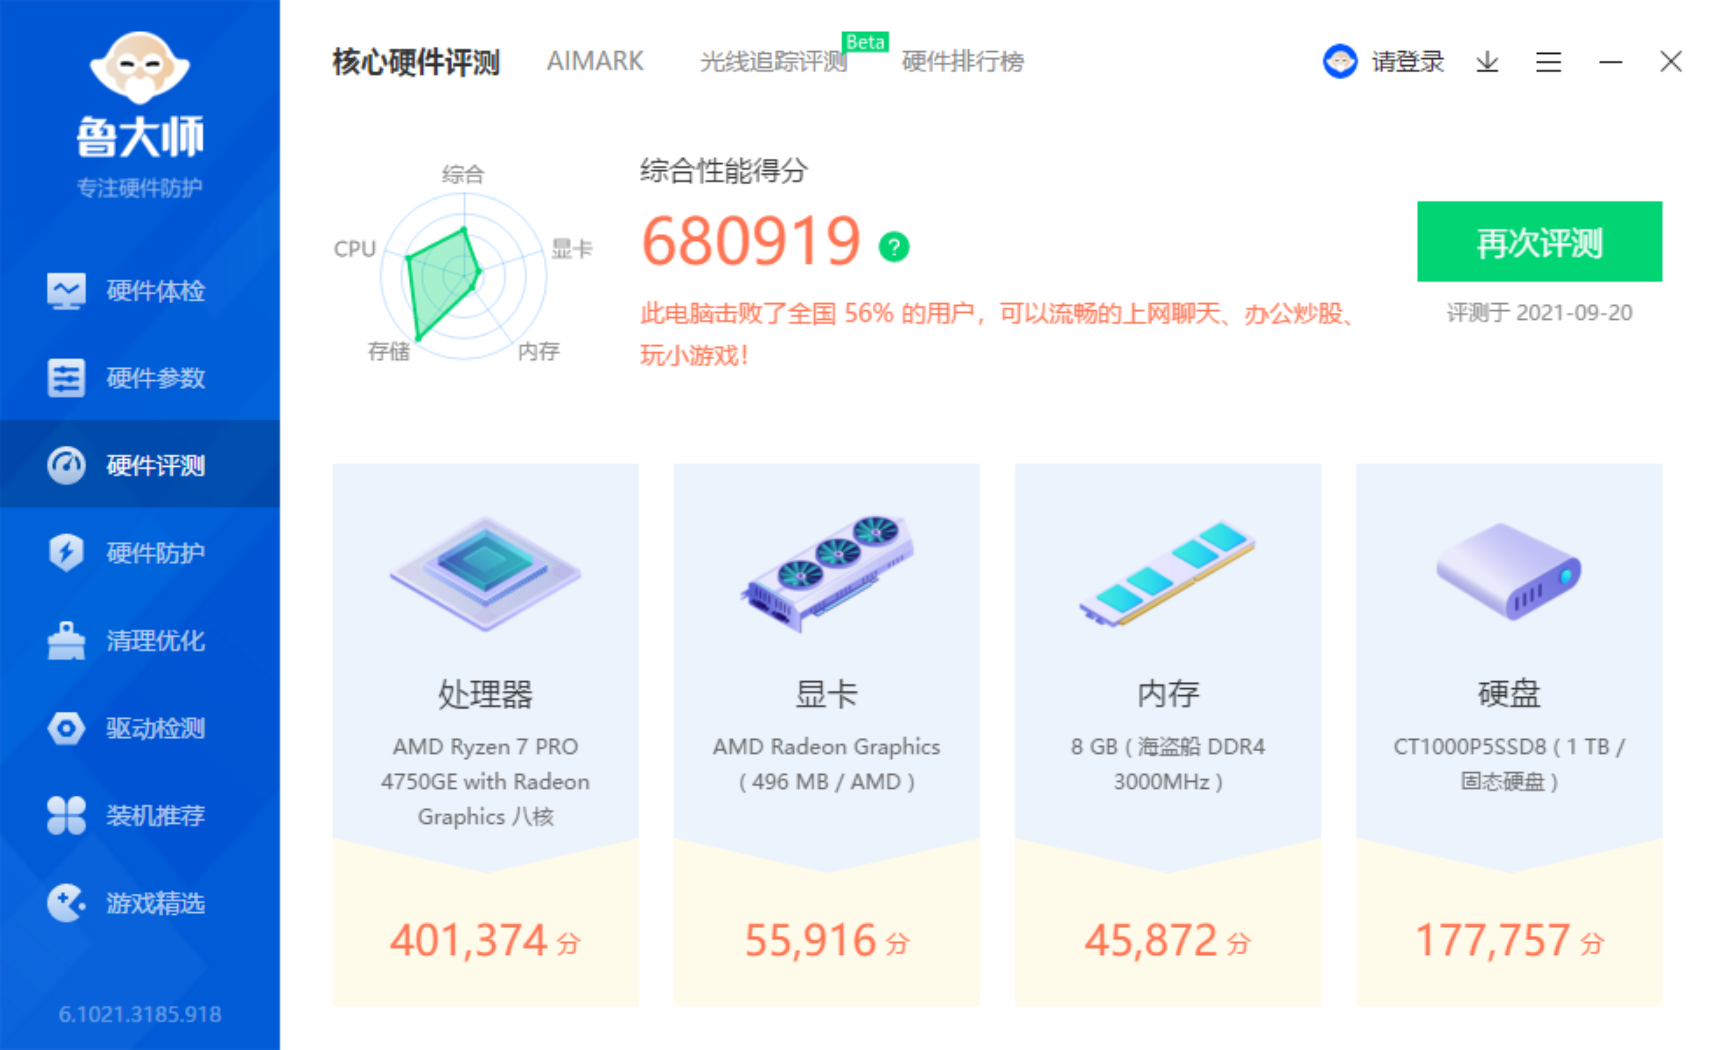
内存8g,频率3000,鲁大师跑分:
接下来进入bios开启amd虚拟化,u盘安装pve,开启硬件直通,在虚拟机里测性能
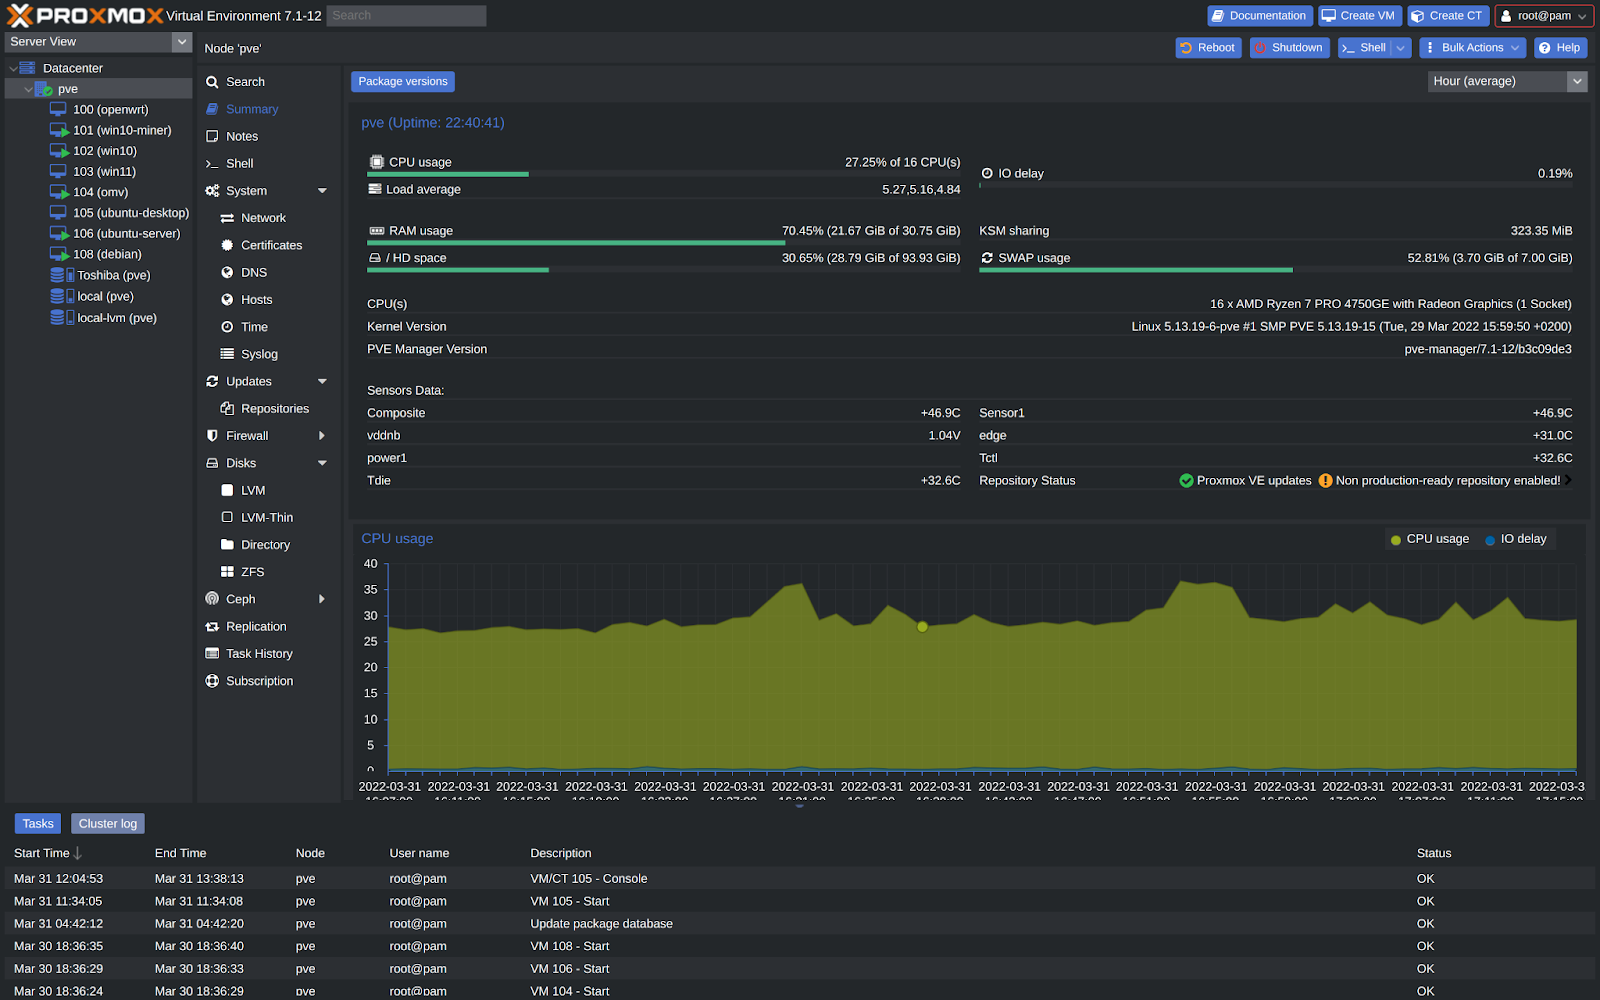
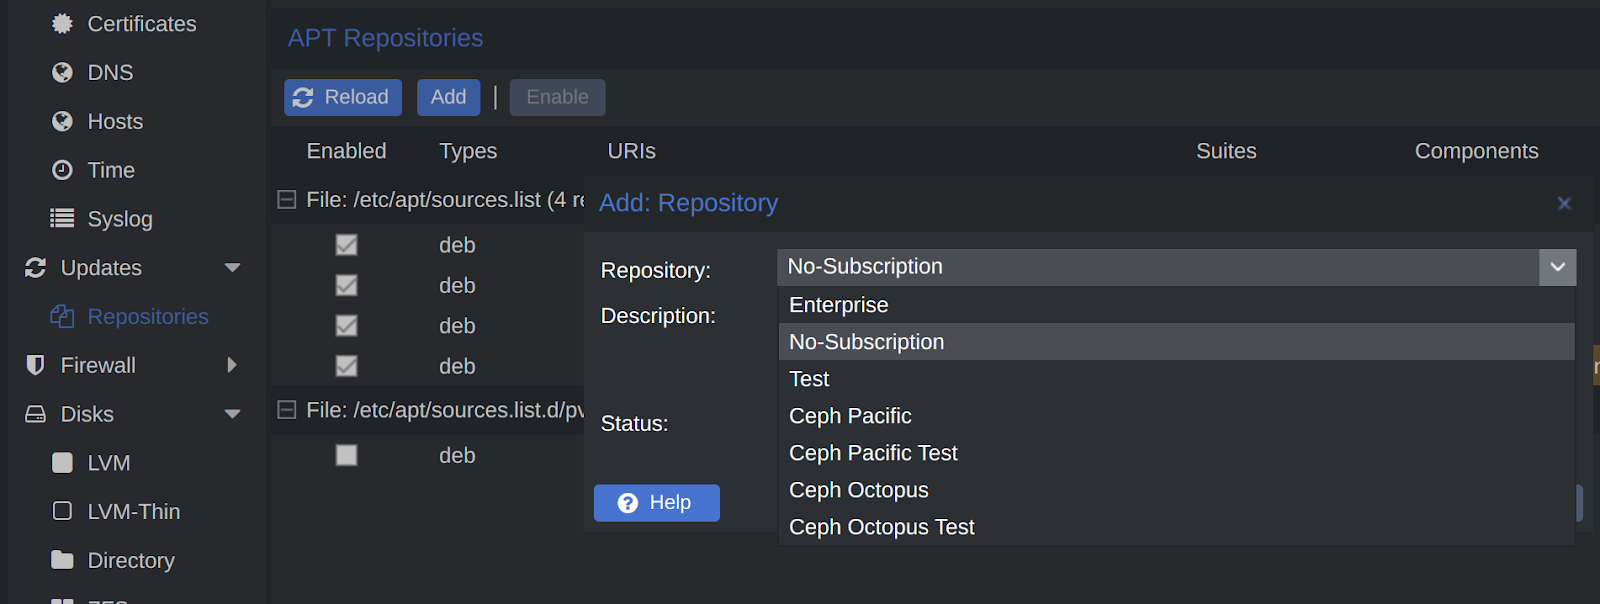
在pve7以后可以直接在web界面关闭企业源,启用非生产环境源获得系统更新:
安装大礼包:
apt update
apt upgrade -y
apt install curl ufw lm-sensors apt-transport-https ca-certificates htop parted ncdu nethogs net-tools ethtool iperf3 vim git fail2ban smartmontools neofetch hollywood lshw cpufrequtils screen -y
vim /etc/fail2ban/jail.conf, 把bantime改成60m
fail2ban-client status sshd
查看cpu当前工作频率:
watch -n 2 “cat /proc/cpuinfo | grep MHz”
查看cpu工作模式:
apt install cpufrequtils
cpufreq-info
设为节能模式:
bash -c ‘for ((i=0;i<$(nproc);i++)); do cpufreq-set -c $i -g powersave; done’
设为按需模式:
bash -c ‘for ((i=0;i<$(nproc);i++)); do cpufreq-set -c $i -g ondemand; done’
设为性能模式:
bash -c ‘for ((i=0;i<$(nproc);i++)); do cpufreq-set -c $i -g performance; done’
查看温度:
apt install lm-sensors
sensors
安装pvetools扩展功能:
https://github.com/ivanhao/pvetools
安装ufw防火墙
apt install ufw
ufw status
ufw allow 22/tcp
ufw enable
ufw allow 8006/tcp
ufw allow 4000/tcp
iptables -L
增大虚拟内存 —— swap交换分区
根目录创建一个32g文件
dd if=/dev/zero of=/swapfile bs=1M count=32768
修改权限:
chown root:root /swapfile
chmod 0600 /swapfile
mkswap /swapfile
swapon /swapfile
修改/etc/fstab,把/dev/pve/swap改成/swapfile
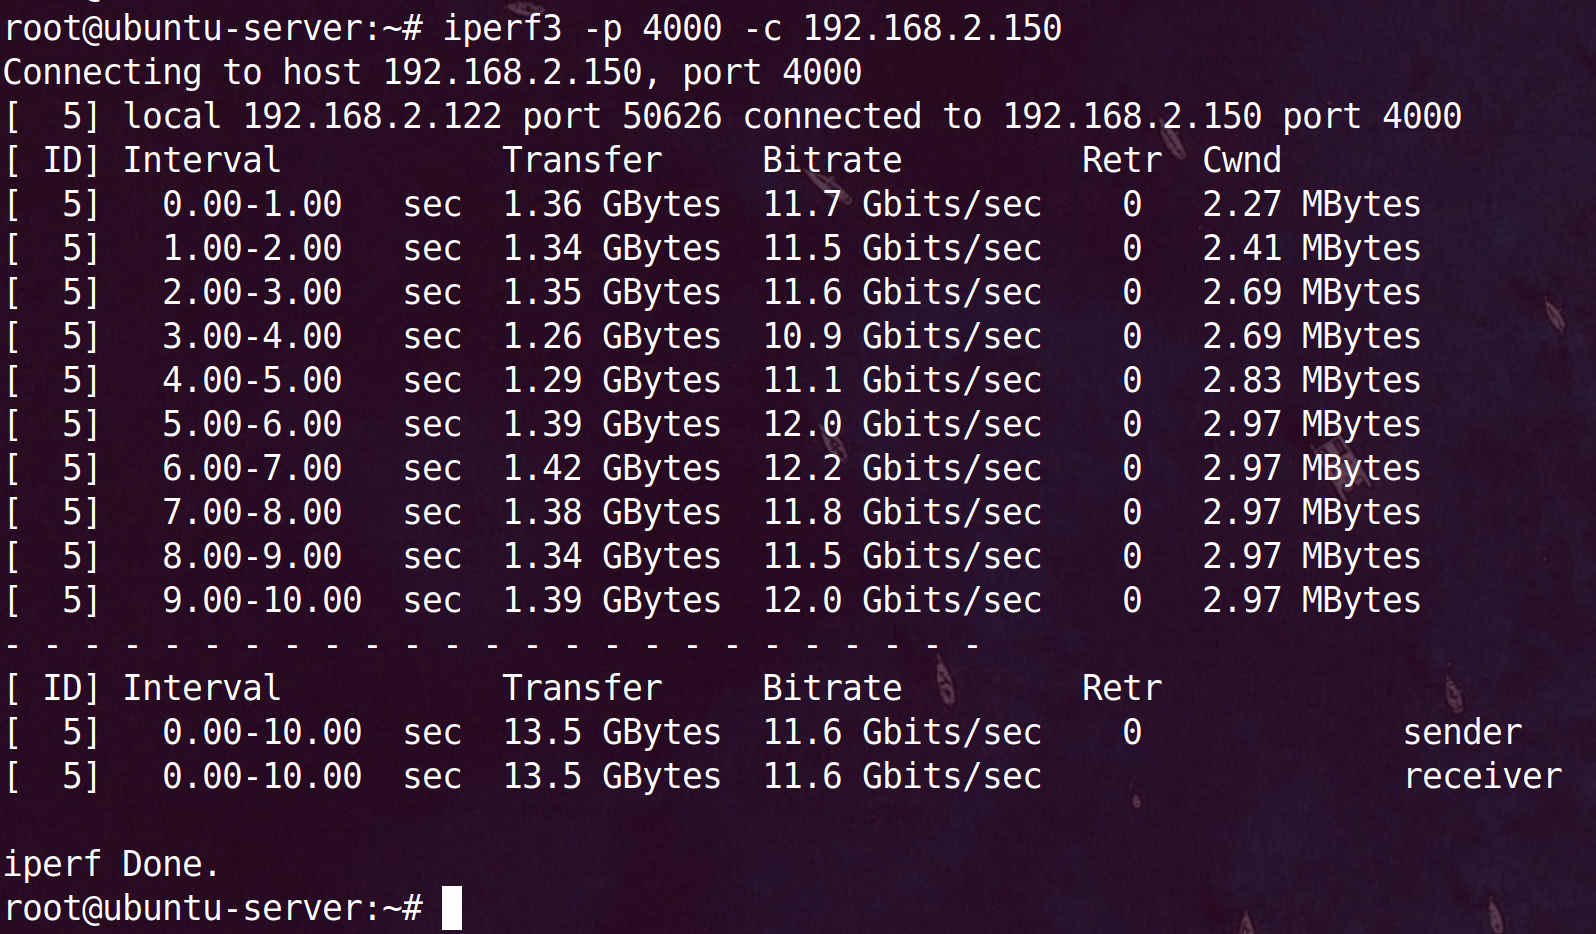
iperf3测速
pve宿主机作为server: iperf3 -s -p 4000
pve虚拟ubuntu作为client: iperf3 -p 4000 -c 192.168.2.150
pve待机功耗:
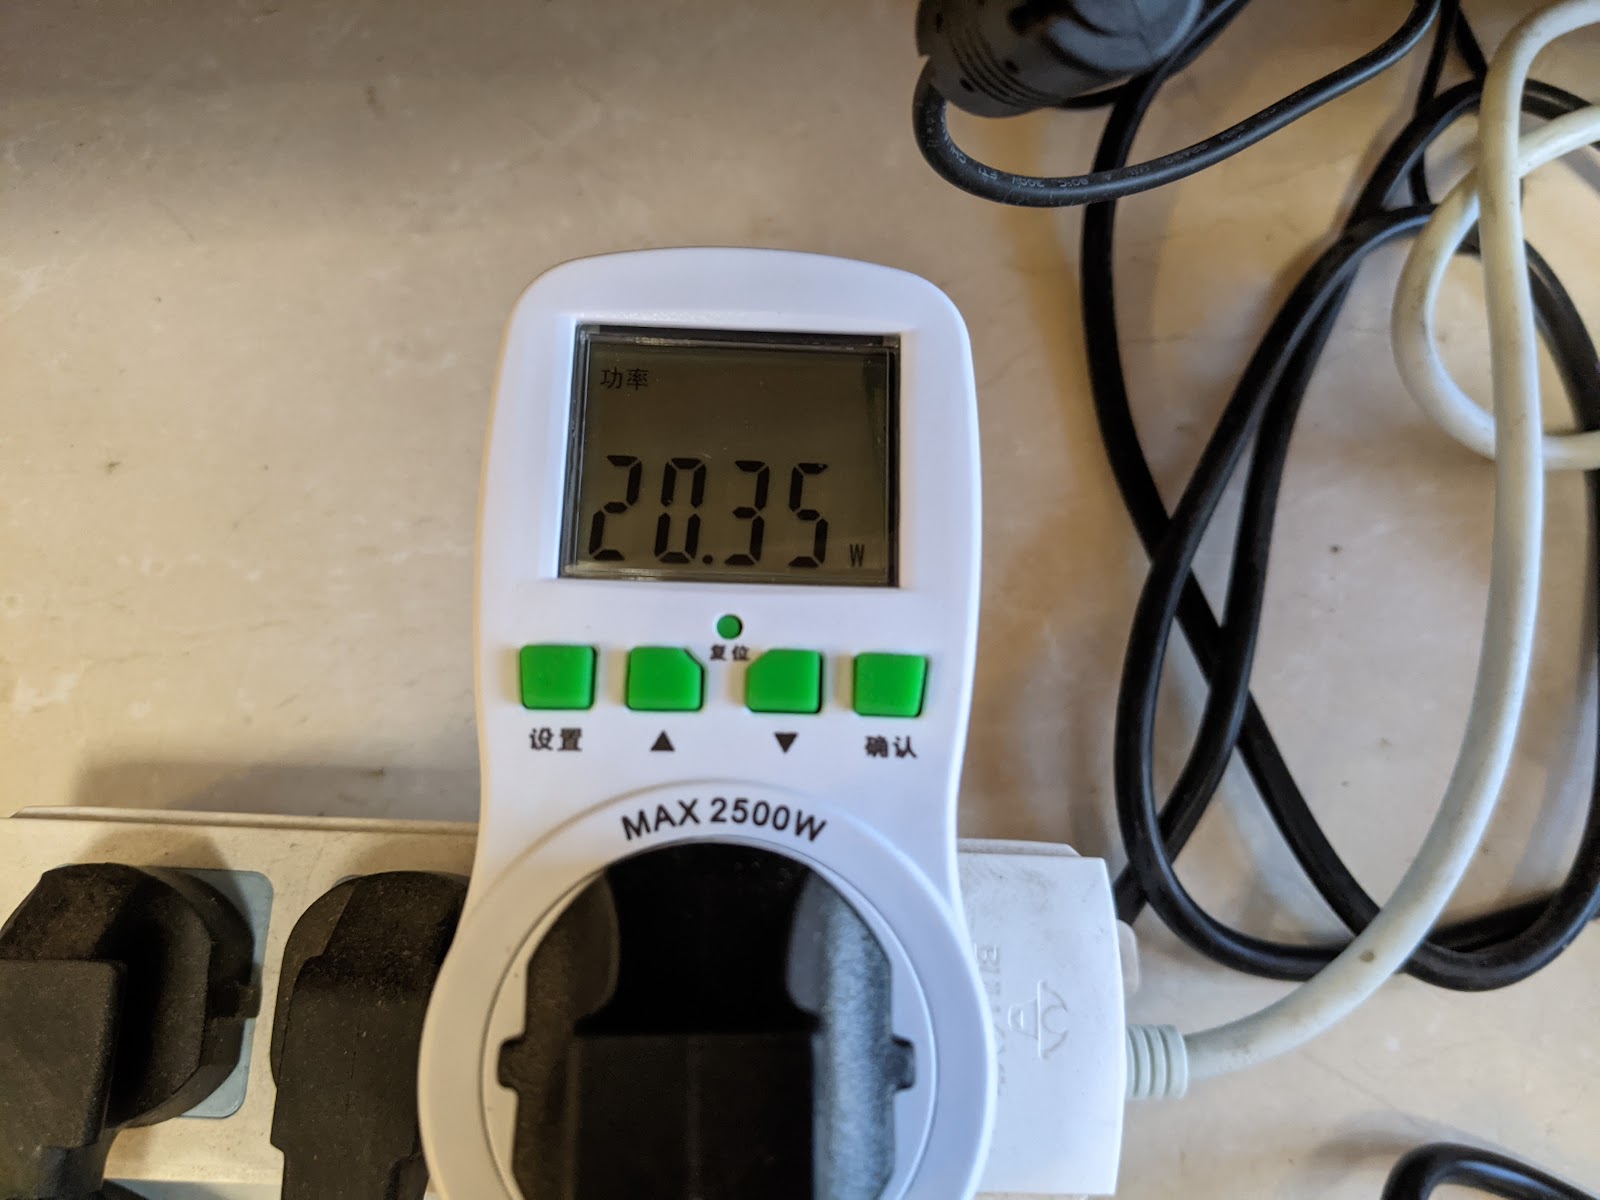
跟裸装win10待机功耗一样,都是20瓦。
pve虚拟一台win10待机功耗:
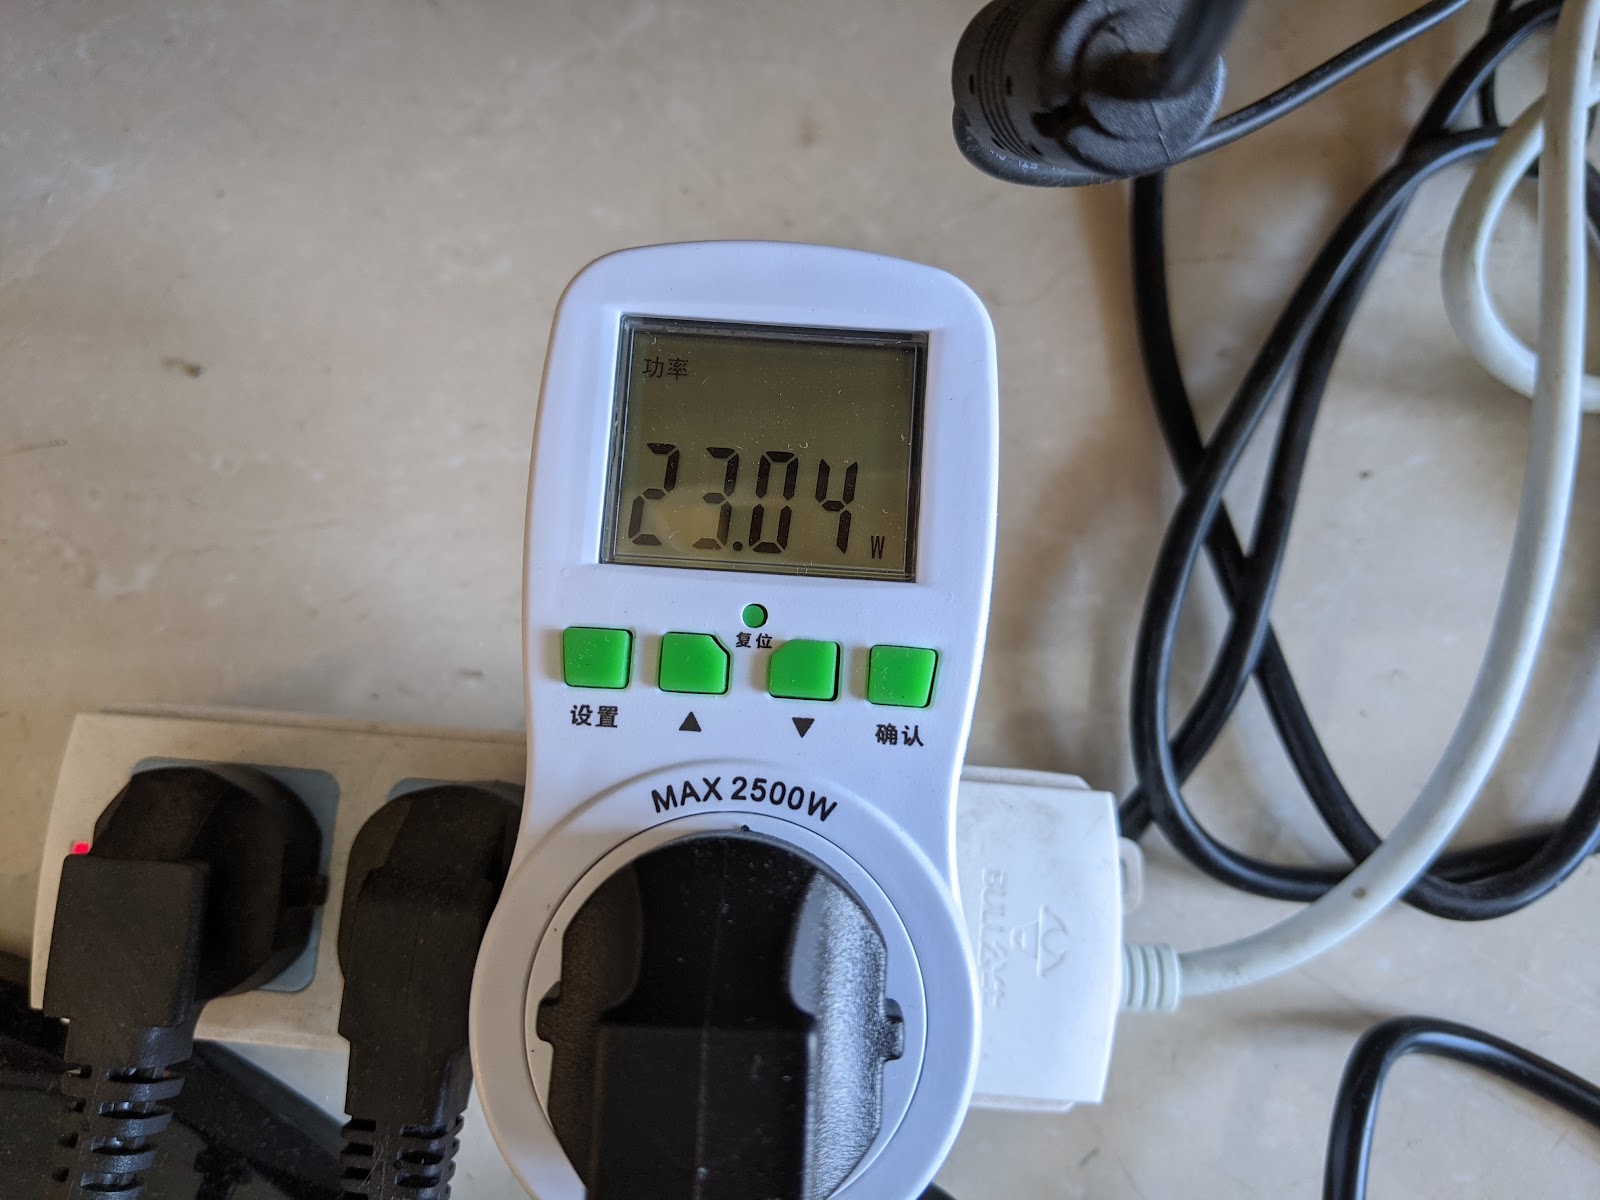
多3瓦。
pve虚拟win10,cpu类型选host,分配所有线程跑分:
分数很接近裸装win10,性能损失3%左右。
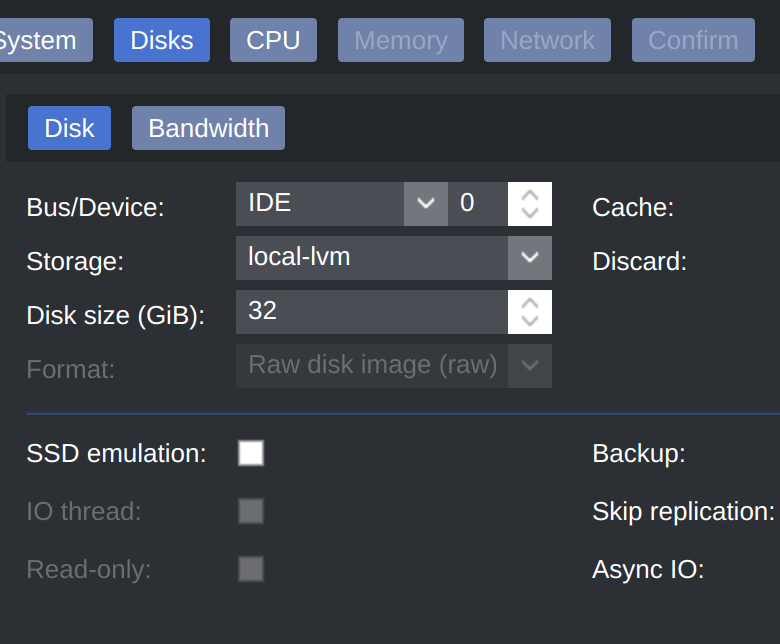
pve虚拟win10,磁盘为IDE测速:

pve虚拟win10,磁盘为SCSI测速:
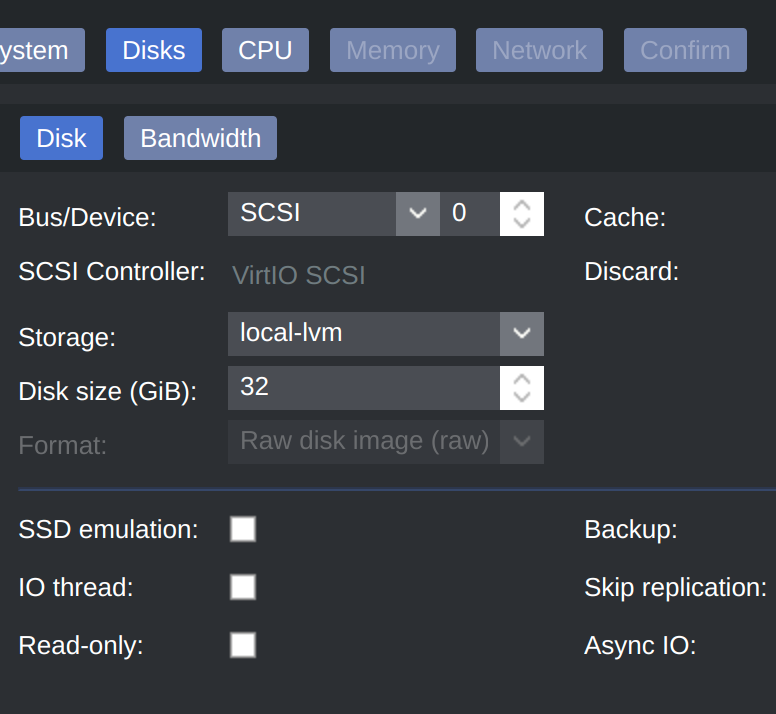
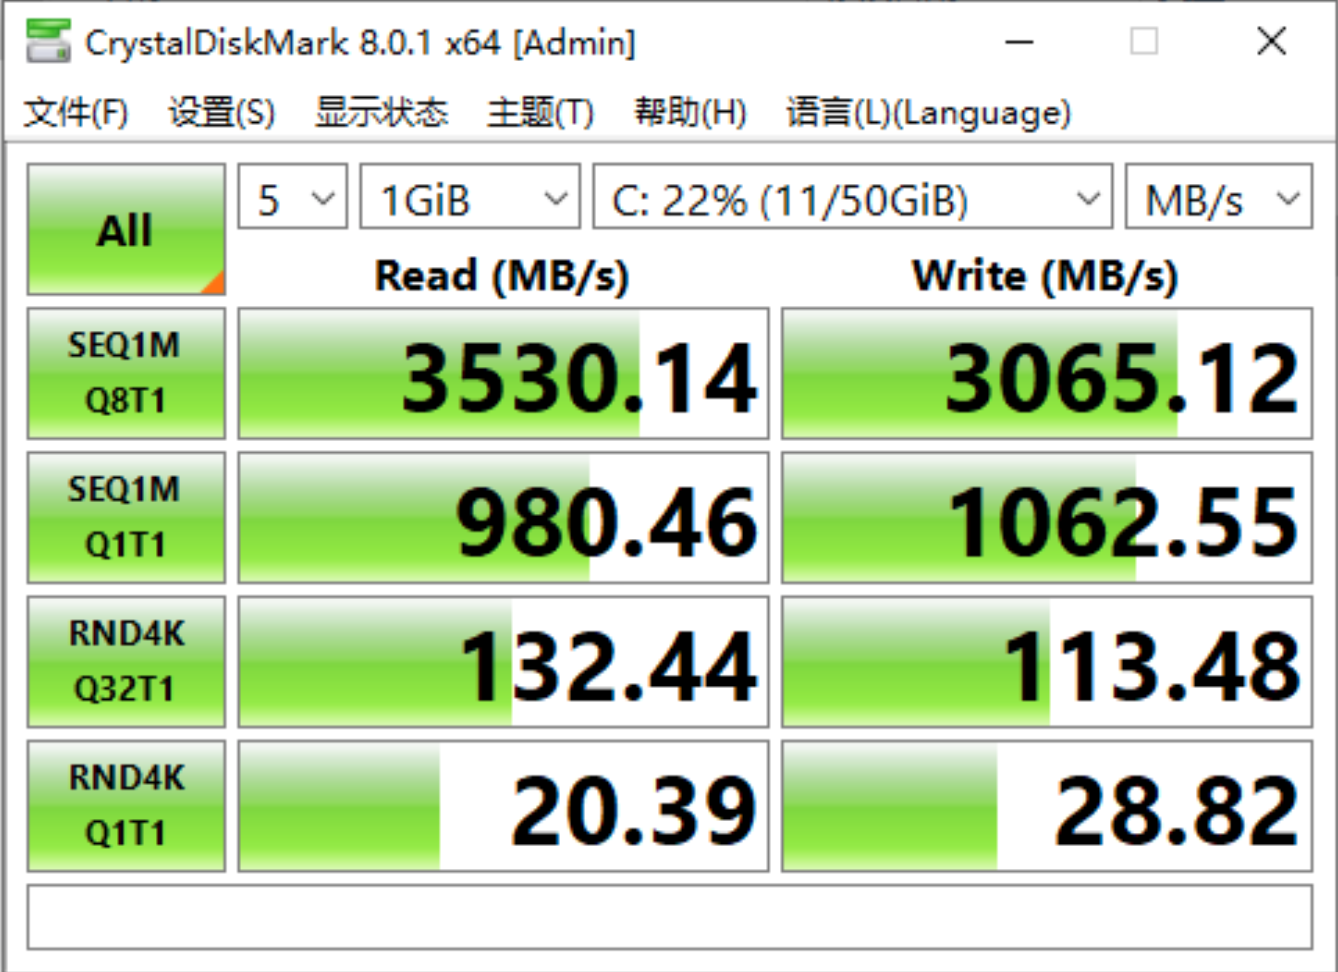
显而易见,应该选择SCSI作为虚拟机磁盘格式。
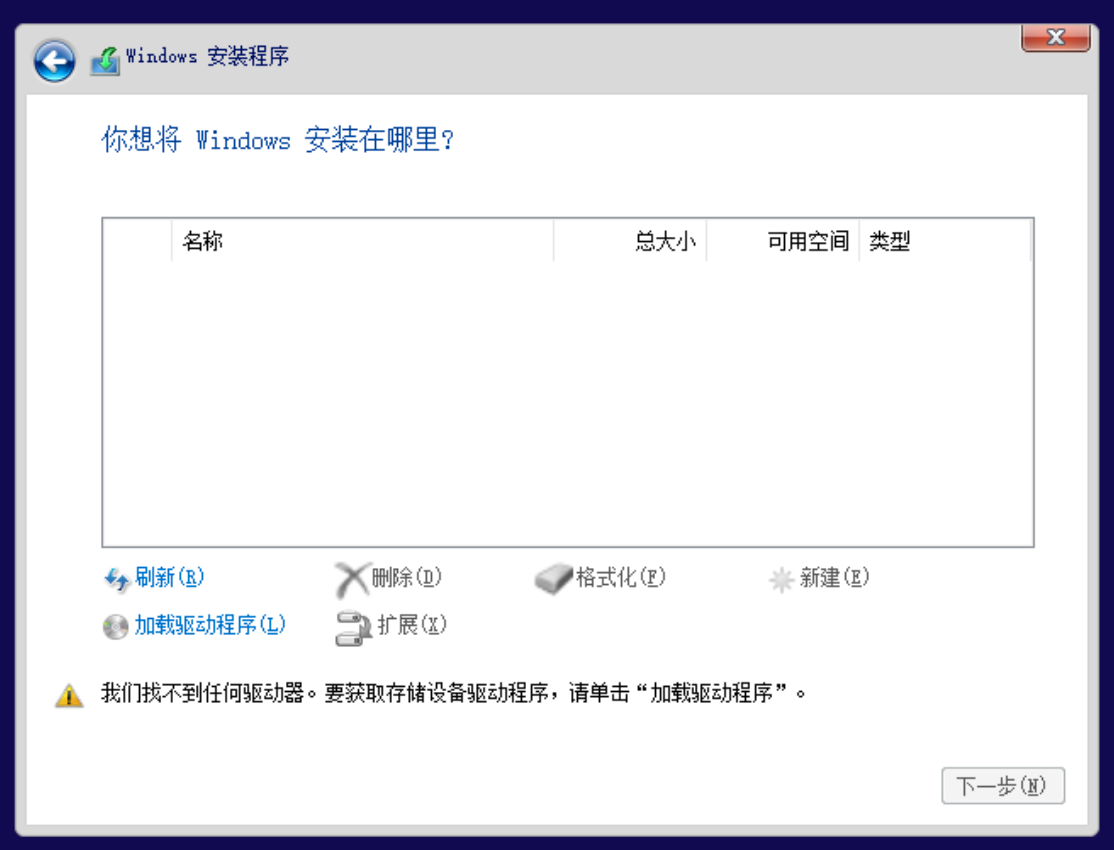
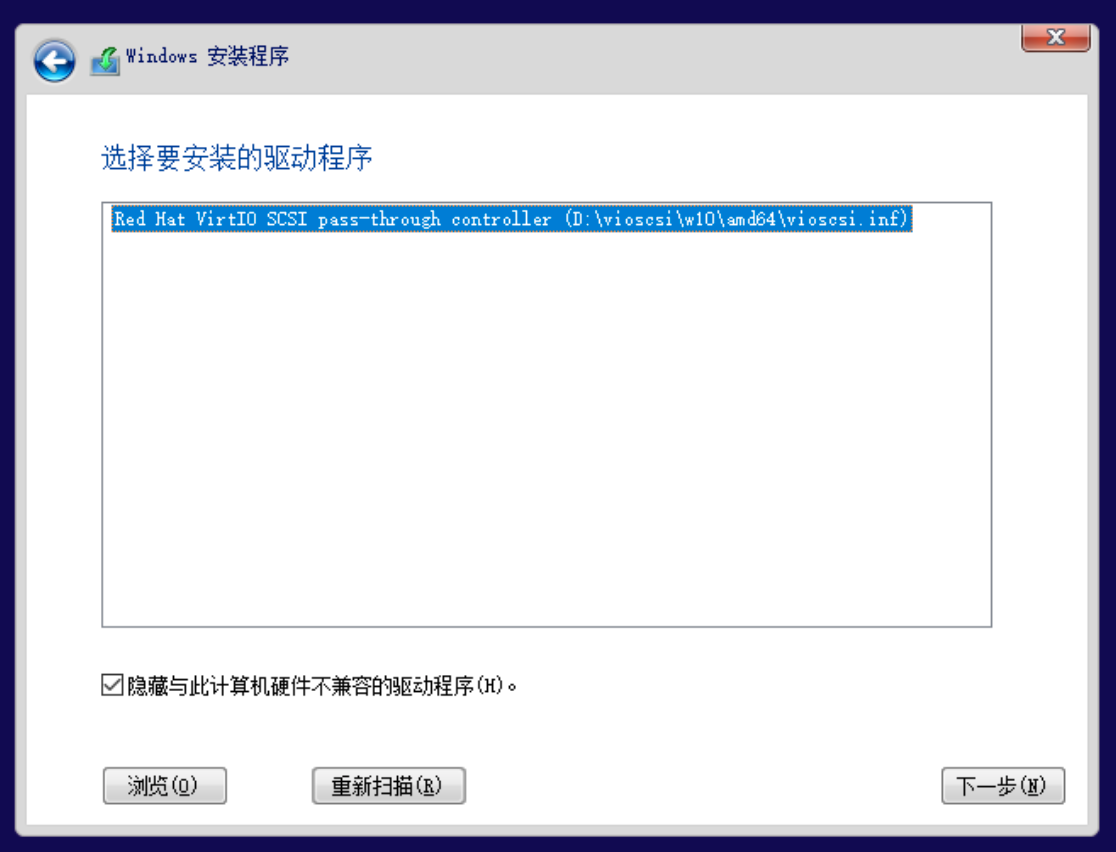
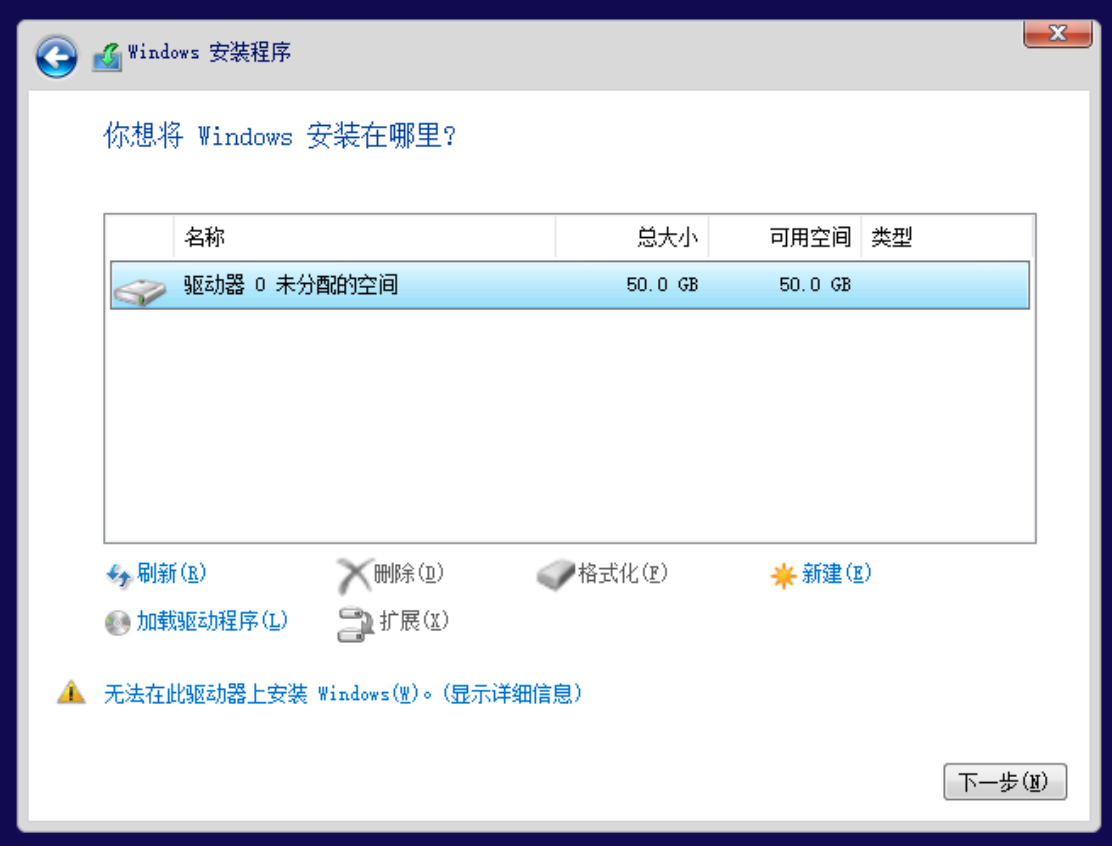
但选择SCSI安装win10不能识别磁盘,需要加载驱动:
解决直通分组问题:
https://pve.proxmox.com/wiki/Pci_passthrough#AMD_CPU
https://mechanical-consciousness.com/2020/03/20/kvm-gpu-passthrough.html
https://post.smzdm.com/p/alpwlzvp/
pve8.1版本对应配置:
GRUB_CMDLINE_LINUX_DEFAULT=“quiet intel_pstate=disable amd_iommu=on iommu=pt textonly pcie_acs_override=downstream,multifunction initcall_blacklist=sysfb_init”
分组前,尝试给win10直通2张显卡:
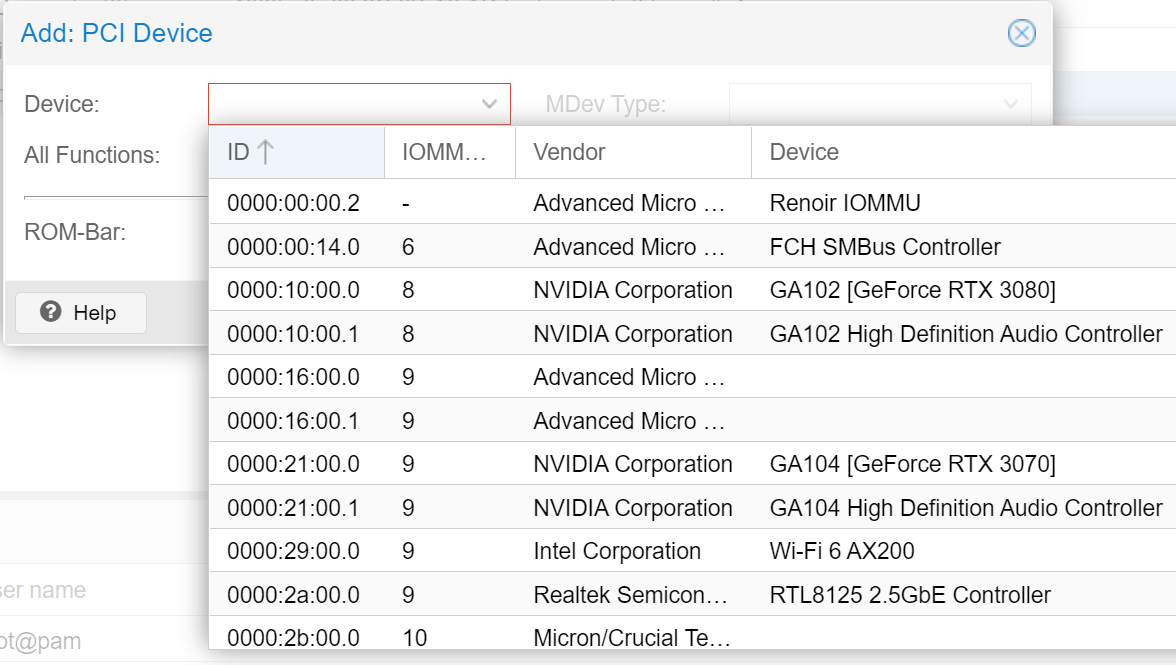
由上图可见,安装2张显卡后3070跟主板2.5G网卡的分组都是9,把3070直通给win10整个pve宿主机都断网失控,这时就要对PCI设备分组
分组后3070变成17,2.5G网卡变成20:
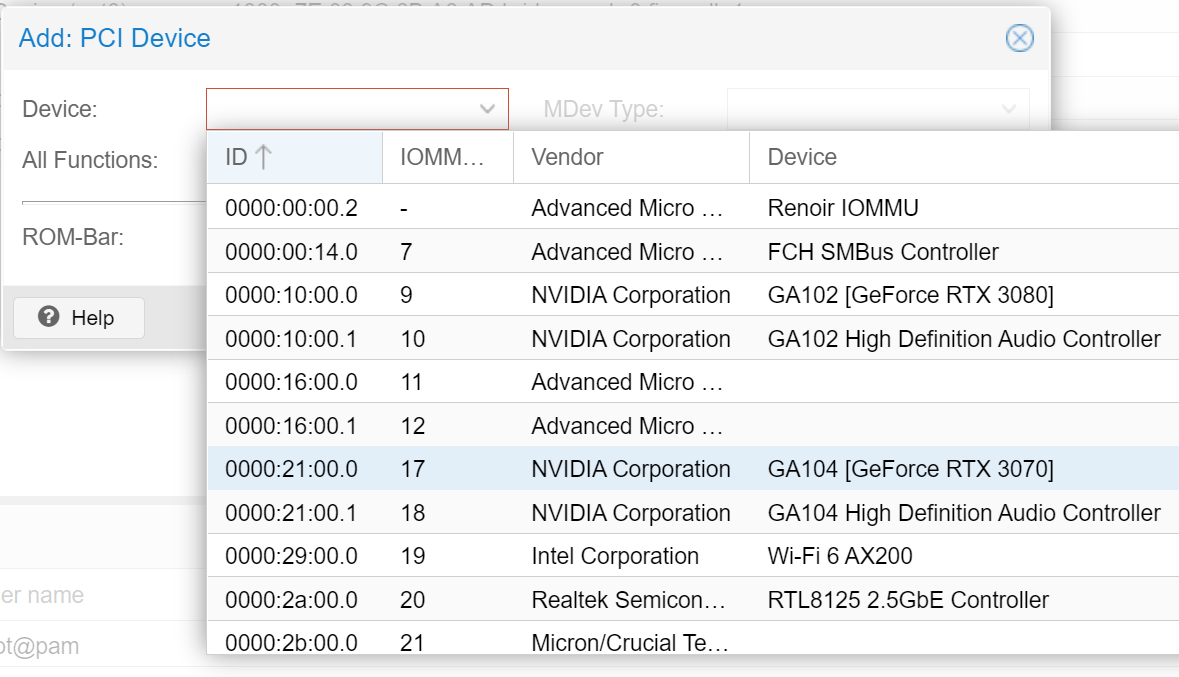
甚至板载AX200无线网卡也分了新的组19,之后就可以进行正常直通。
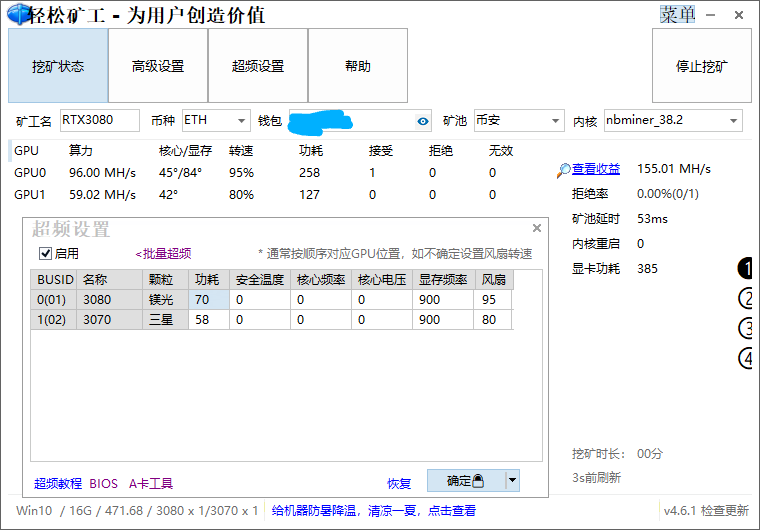
测试显卡挖矿,直通后性能没有损失,跟裸装一样:
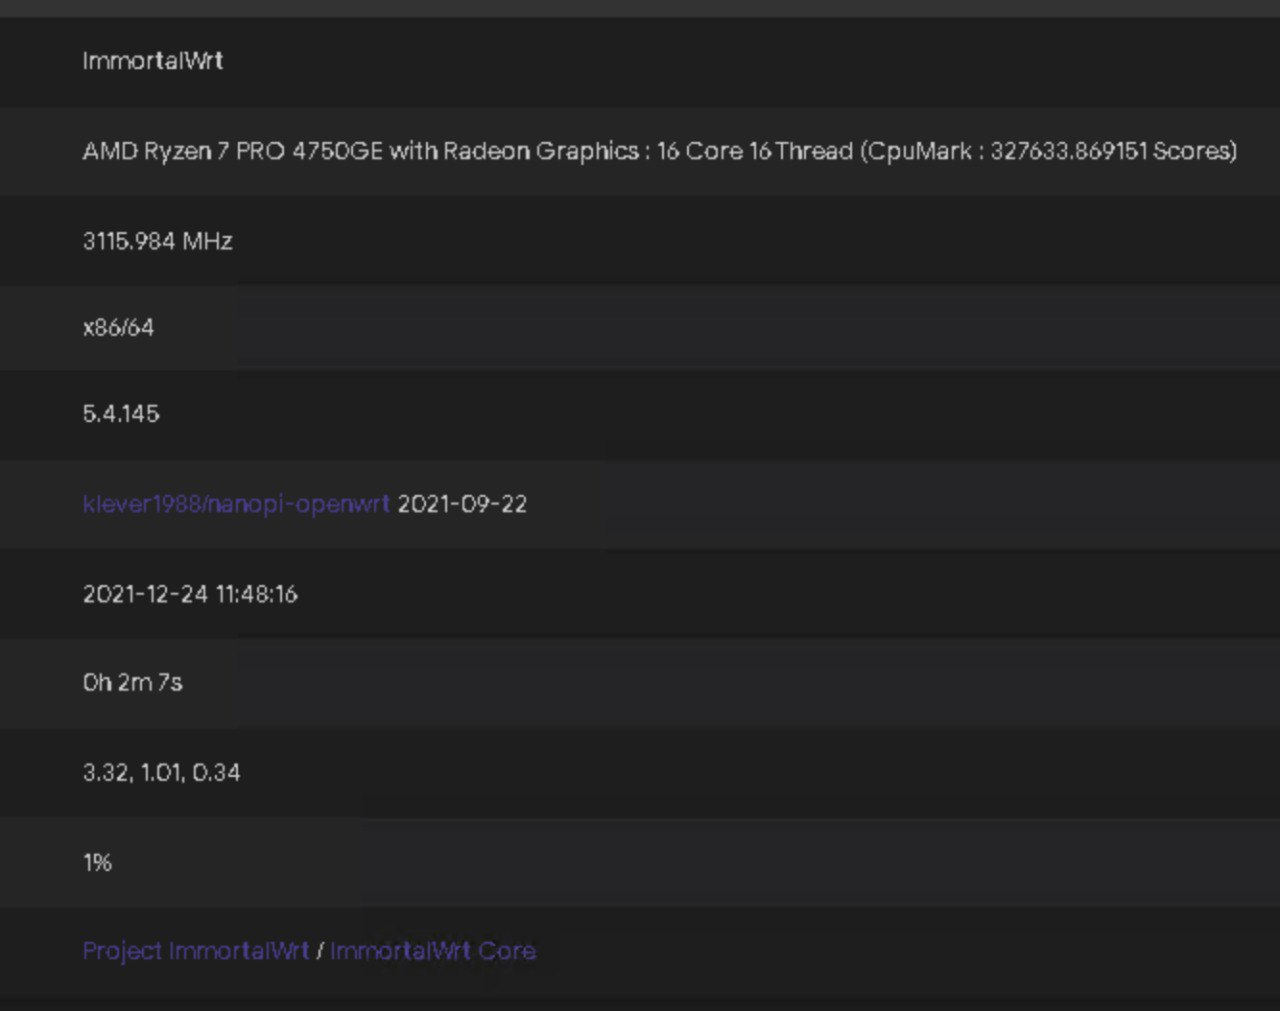
pve虚拟openwrt,cpu类型选host,分配所有线程跑分:
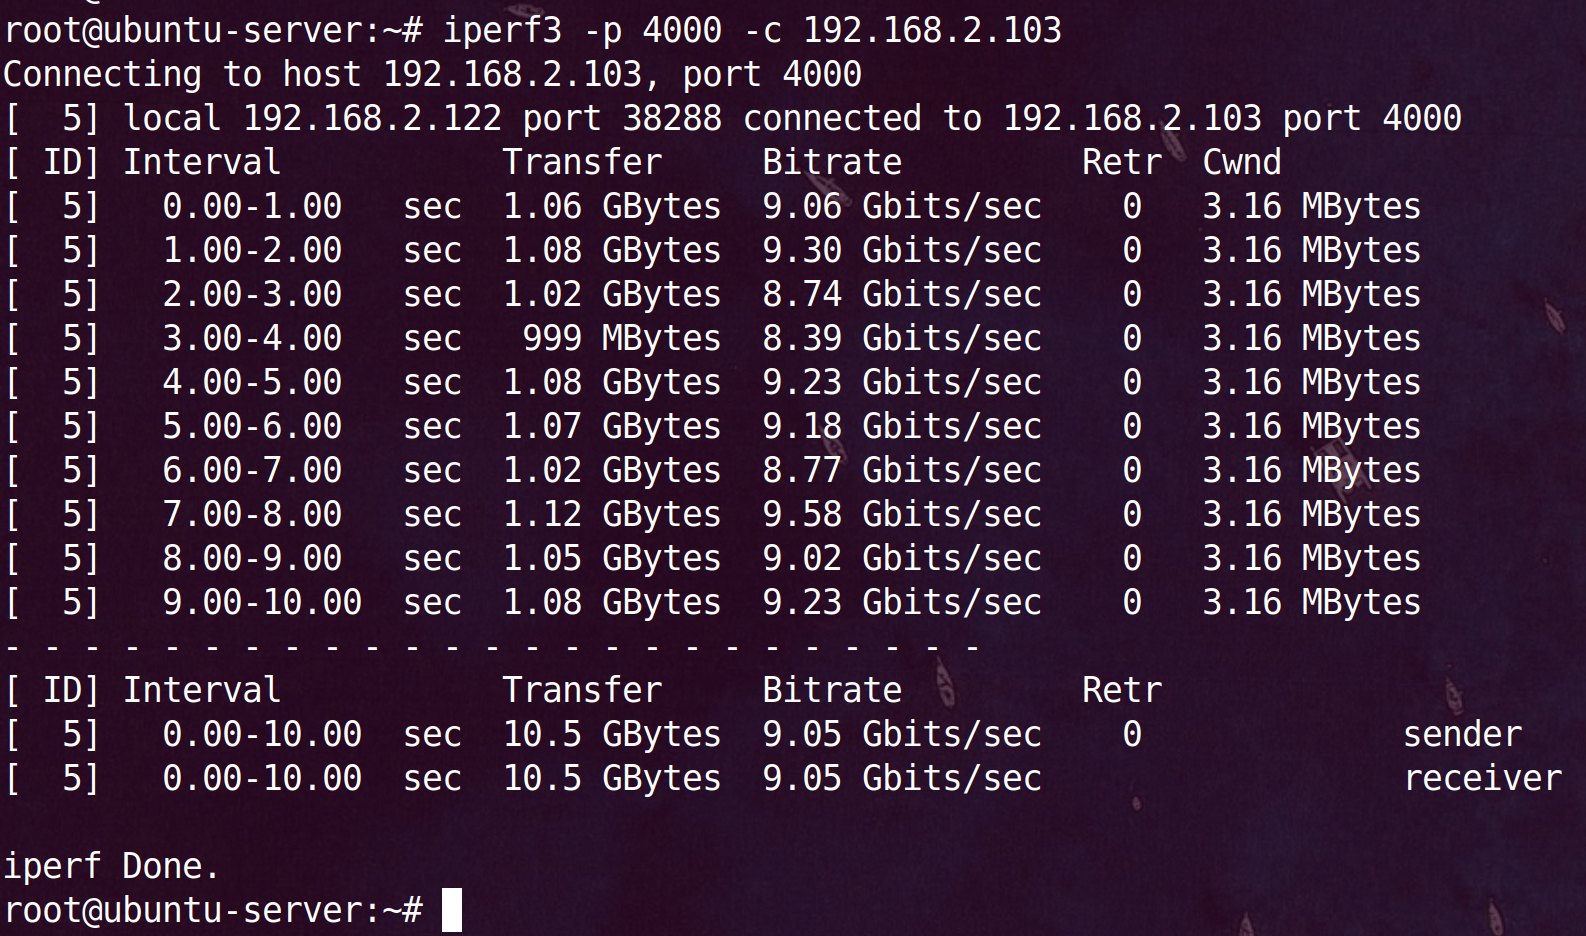
pve虚拟debian作为server: iperf3 -s -p 4000
pve虚拟ubuntu作为client: iperf3 -p 4000 -c 192.168.2.103
pve虚拟2台win10,互拷文件:
![]()
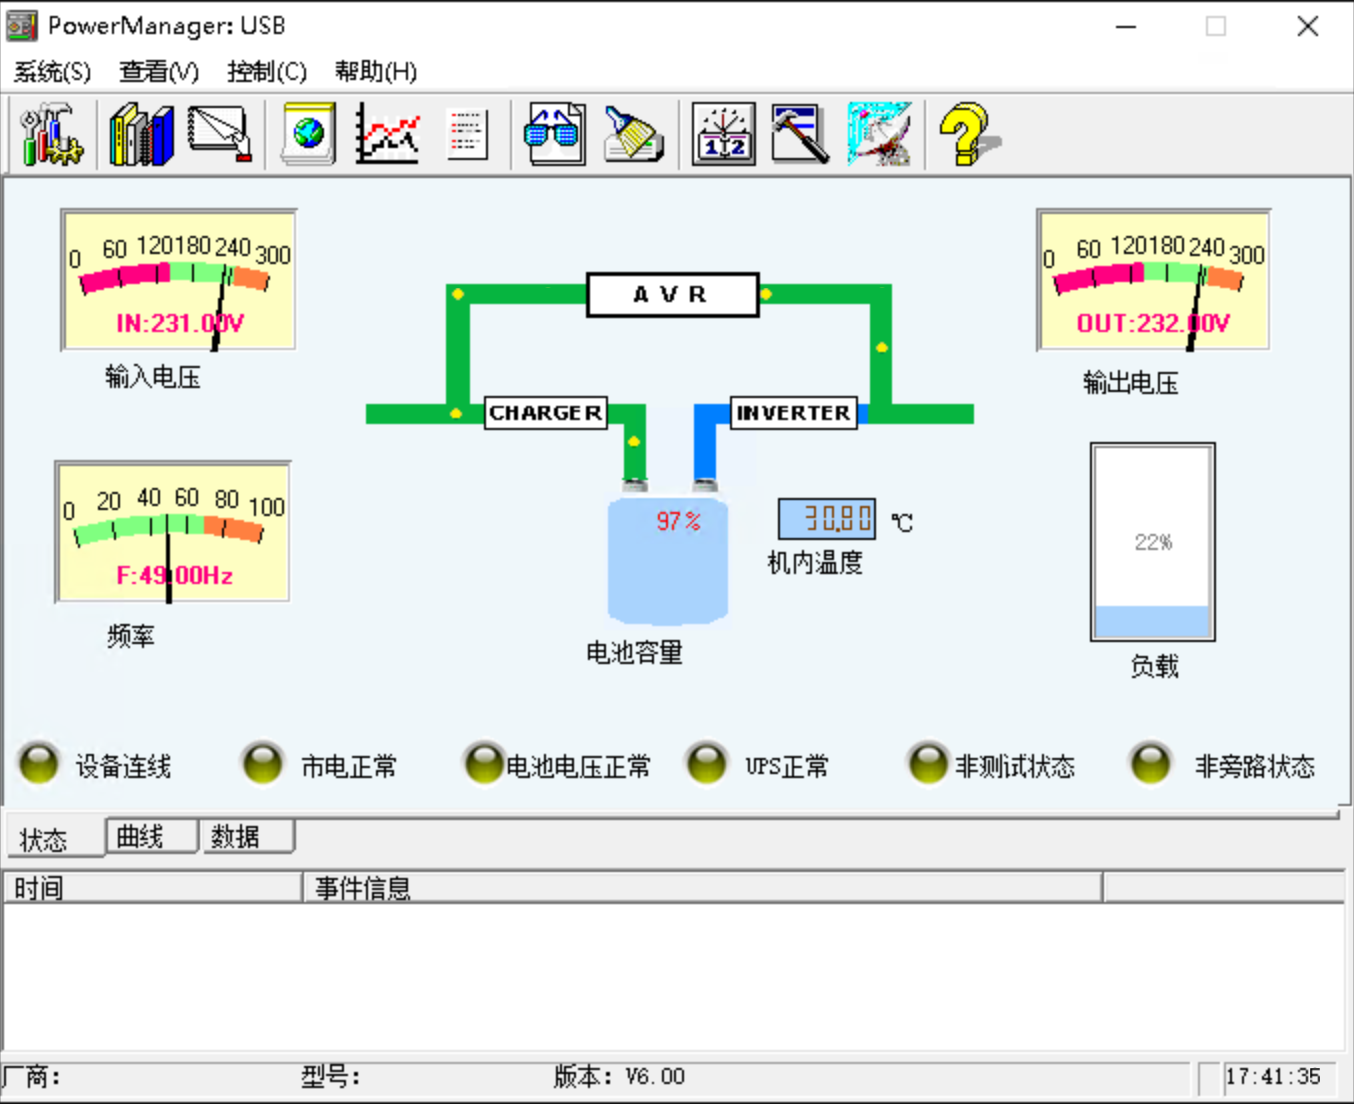
意外断电
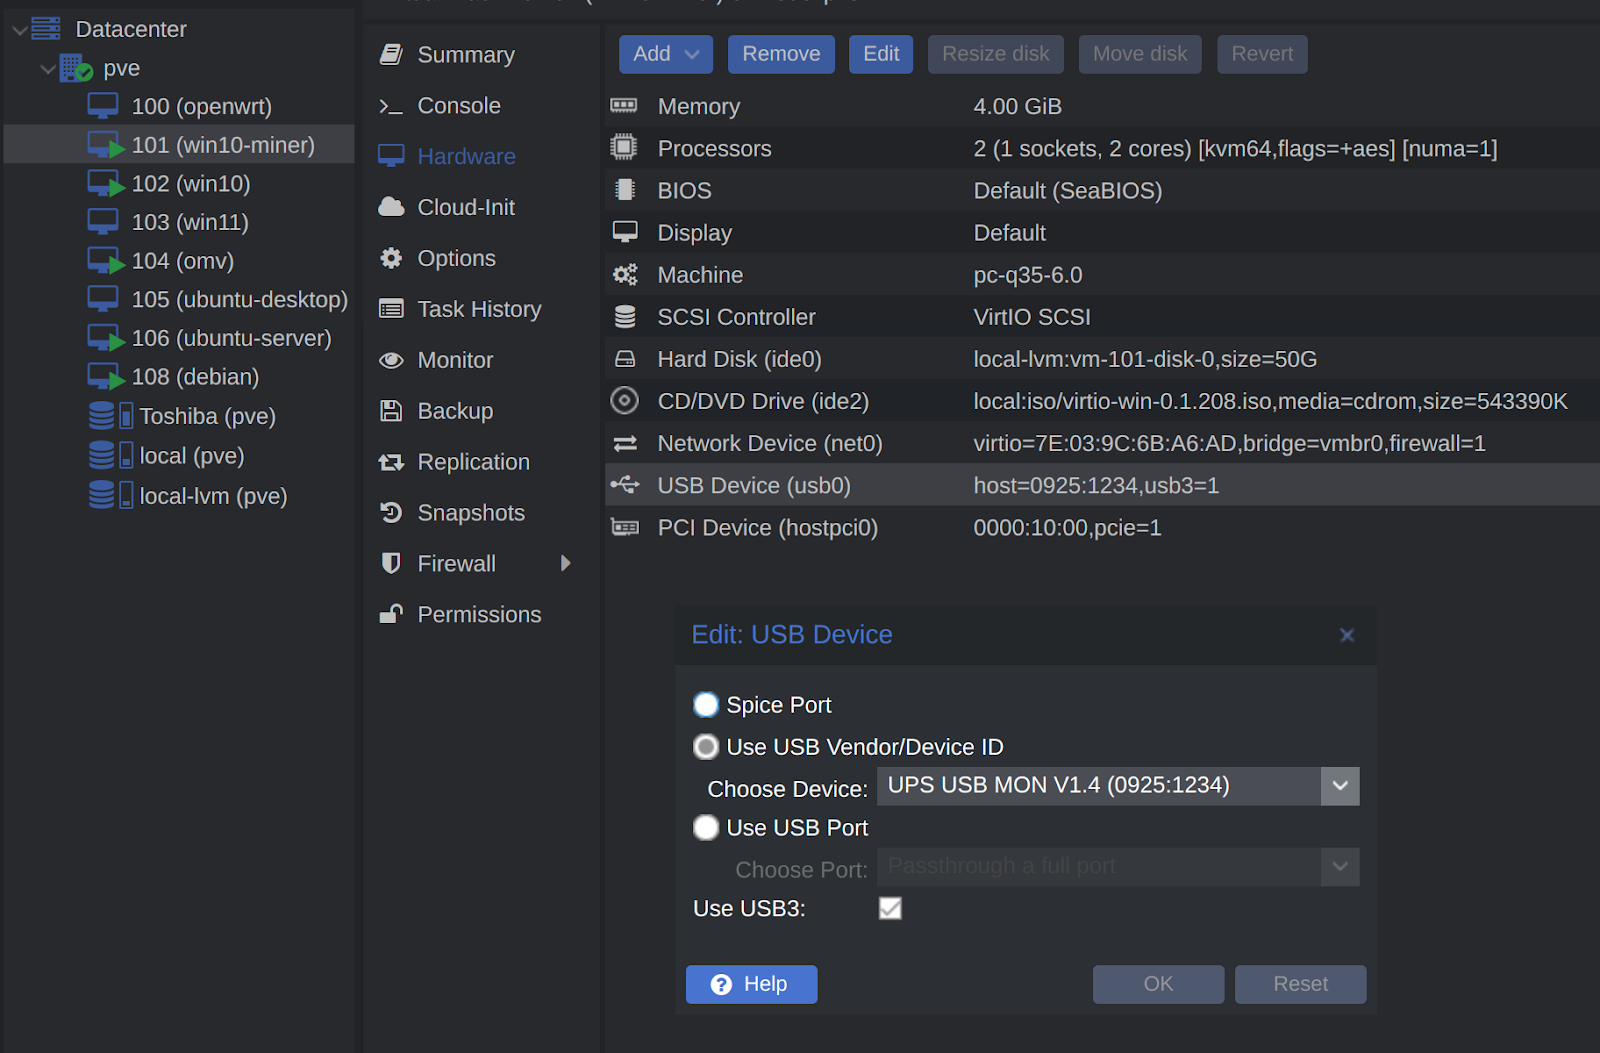
把ups的usb直通给win10-miner:
停电后立马关机减轻电源负担:
bash脚本自动关机,pve会先关掉所有vm再关宿主机,前提是每个vm都安装了qemu-guest-agent:
mkdir -p /root/shutdown
cd /root/shutdown
touch shutdown.sh
chmod +x shutdown.sh
1 | #!/bin/sh |
原理:pve每隔30秒ping一次192.168.2.x,累积达到12次(6分钟)则触发关机动作,关机前给自己telegram机器人发消息并记录日志,当然弱电箱光猫、路由器、交换机也有ups续命。
vim /etc/rc.loacl
1 |
|
chmod +x /etc/rc.loacl
reboot
If you like this blog or find it useful for you, you are welcome to comment on it. You are also welcome to share this blog, so that more people can participate in it. If the images used in the blog infringe your copyright, please contact the author to delete them. Thank you !